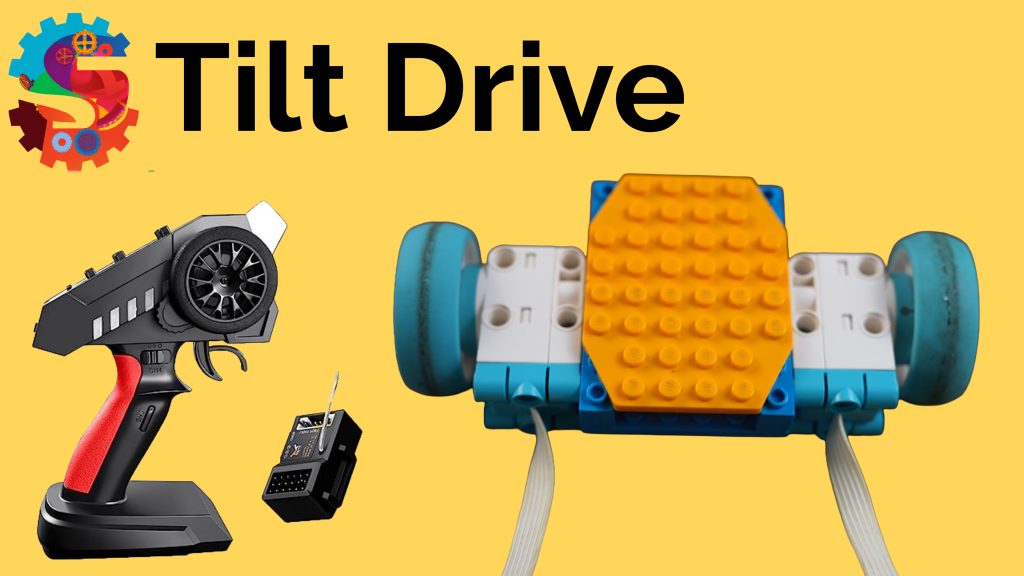
Control a LEGO Spike Robot with Motion: Using the Gyroscope

Control LEGO Spike Essential with Motion: Using a Gyroscope

Introduce

Today we are going to learn how to control a robot in a completely different way. Instead of pressing buttons or using a controller, we will use motion. The LEGO SPIKE hub has a built-in gyroscope that can detect how it is tilted, and we will use that to drive our robot.


Engage

Think about the different ways you control things in your life.

All of these use buttons, joysticks, or touch controls.

What if you could control something just by moving your hand?
Have you ever played a game where you tilt a device to steer?

Today, your hand becomes the controller.


Build & Explore

You are going to build a simple driving robot using:

Important challenge:

As you build, think about:

Once built, explore:


Explain

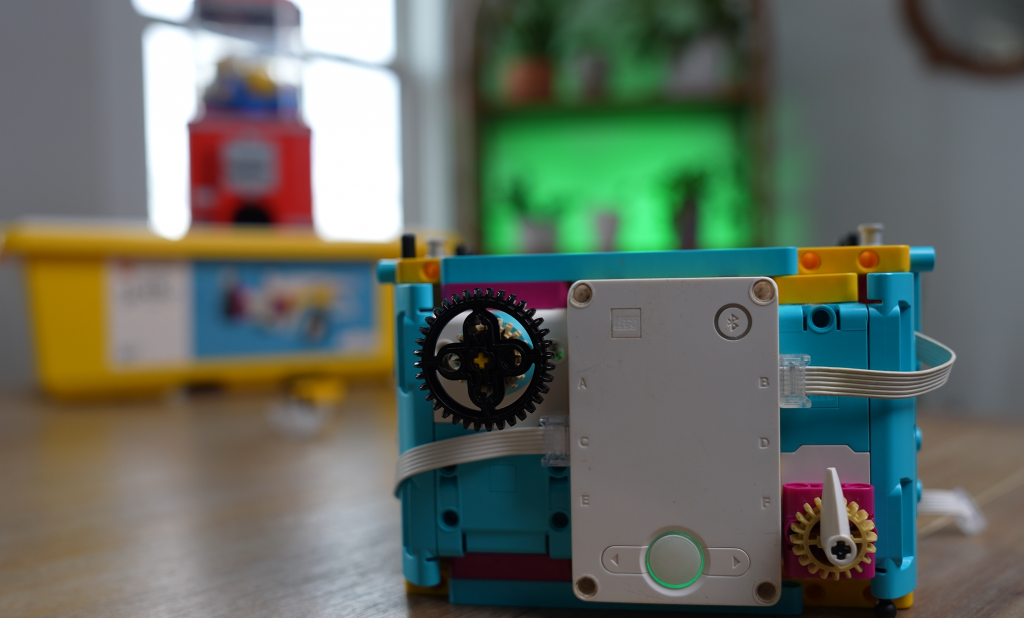
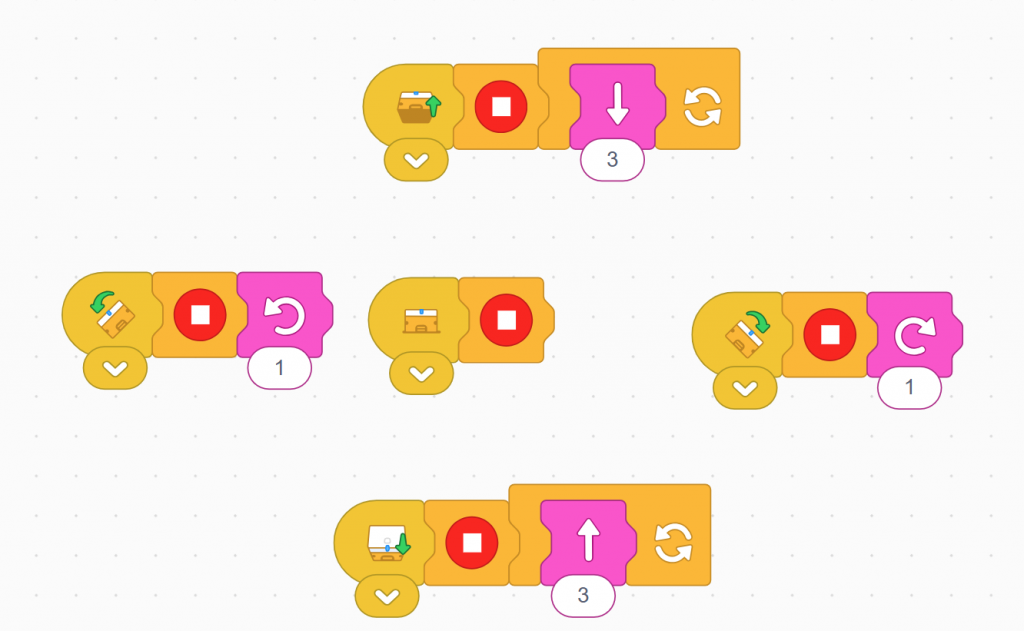
The hub contains a gyroscope. A gyroscope measures orientation and movement.

It tracks three types of motion:

We use this data in our code to control the motors.

For example:

When the hub is flat, the robot should stop.

You will use movement blocks with two motors to control direction, and tilt blocks to detect motion.


Elaborate

Now that your robot works, how can you improve it?

Try these ideas:

Think bigger:


Evaluate

Answer these questions to show your understanding:

  1. What does a gyroscope measure?
  2. What are pitch, roll, and yaw?
  3. Why do we use two motors with movement blocks?
  4. Why might the robot behave incorrectly if commands overlap?
  5. How does adding a stop block improve performance?
  6. What is one way you improved your robot design?

Digestion Dash: The Ultimate Body Adventure!

Digestion Dash: The Ultimate Body Adventure!

Get ready to race through the human body in Digestion Dash! In this game, you’ll follow food on an epic journey—from the first bite all the way to the end. Along the way, you’ll play mini-games and learn how your digestive system turns food into nutrients your body can use.


Mouth – Bite It & Chew It

Digestion begins in the mouth!

Your teeth break food into smaller pieces. This is called mechanical digestion. As you chew, your tongue moves the food around and mixes it with saliva.

Saliva starts chemical digestion, breaking food down even more. All together, this forms a soft ball of food called a bolus.

Mini-Games:


Esophagus – Swallow It

Time to swallow!

The bolus travels down the esophagus, a stretchy tube that pushes food toward your stomach using squeezing motions. The squeezing motion is called peristalsis.

Mini-Game:


Stomach – Churn It

Welcome to the stomach!

Here, food is mixed with strong acid and enzymes like pepsin. The stomach muscles churn the food, continuing both mechanical digestion and chemical digestion.

The food becomes a thick liquid as it prepares for the next stage. This thick liquid is called Chyme.

Mini-Game:


Small Intestine – Enzyme Dash & Nutrient Dash

This is where the magic happens!

In the small intestine, especially the duodenum, your body breaks food down into usable nutrients.

The pancreas sends enzymes like lipase to break down fats. The liver produces bile, which helps digest fats even more.

Now the nutrients are small enough to be absorbed into your bloodstream!

Mini-Games:


Large Intestine – Hold It

Next stop: the large intestine.

Here, your body focuses on removing water from the leftover material. What’s left becomes solid waste.

Mini-Game:


The Finish Line – Poop

The final stage!

Waste is stored in the rectum until it leaves the body through the anus.

🎮 Mini-Game:


Why This Matters

Every time you eat, your body is hard at work using mechanical digestion and chemical digestion to turn food into nutrients that give you energy, help you grow, and keep you healthy.


Play the Game!

Ready to test your skills and race through the digestive system?

Digestion Dash Game

Interactive Weather Game

Interactive Weather Game: Learn the Water Cycle by Controlling a Cloud

If you’re looking for a hands-on way to teach the water cycle and basic weather science, this browser-based game offers an engaging, intuitive experience. Players control a cloud, collect water vapor, release rain, and watch plants grow as they explore how water moves through the environment in real time.

Play the game here: https://sprattronics.com/wp-content/uploads/2026/03/WeatherGame.html

What This Weather Game Teaches

This science-focused simulation lets players guide a cloud across a landscape while observing evaporation, condensation, precipitation, and plant growth. As the cloud absorbs water vapor and becomes saturated, it eventually releases rain that nourishes the environment. The game turns the water cycle into a visual, interactive system that players can influence and understand through direct experimentation.

Core Concepts Covered

Evaporation Water from rivers, soil, and plants turns into vapor and rises into the atmosphere. In the game, you’ll see vapor particles rising from the ground to show this process in action.

Condensation As vapor collects, it forms clouds. Your cloud becomes larger and darker as it fills with moisture.

Precipitation When the cloud reaches full saturation, it releases rain. In the game, rainfall begins automatically once the cloud hits 100 percent capacity.

Collection and Growth Water returns to the ground and supports plant life. Rainfall helps flowers grow, demonstrating how ecosystems depend on water availability.

Ecosystems and Environmental Science

Beyond the water cycle, the game introduces players to basic ecosystem dynamics. Plants respond to rainfall, different surfaces influence evaporation rates, and the environment changes based on player decisions. These interactions help players see how weather patterns affect living systems.

Why This Game Works for Learning

This is an interactive model rather than a passive lesson. Players learn by experimenting, observing patterns, making predictions, and seeing immediate results. This approach supports experiential learning, which is one of the most effective ways to teach STEM concepts.

Skills Students Build While Playing

The game encourages:

It works well for elementary and middle school students, homeschool lessons, STEM labs, makerspaces, and any learner who enjoys interactive science activities.

Ideal for Teachers and Parents

This game can be used as a:

Guiding questions might include:

What Makes This Game Stand Out

Unlike worksheets or videos, this game simulates a real system, gives players control, provides instant feedback, and shows how weather influences life. It transforms an abstract concept into something visual, interactive, and memorable.

SEO Keywords

water cycle game weather simulation for kids science games online interactive science activities STEM games for elementary students learn evaporation condensation precipitation ecosystem simulation game educational browser games

Final Thoughts

To truly understand science, students need more than definitions. They need experiences. This weather game turns the water cycle into something players can see, control, and explore.

Try the game here: https://sprattronics.com/wp-content/uploads/2026/03/WeatherGame.html

For more hands-on STEM activities, visit Sprattronics, where learning is built, explored, and experienced.

Retro Weather Video Game

LEGO Baseplate Builder

Free 16x16 LEGO® Plate Builder: Create Custom LEGO Challenge Cards

Unlock your creativity and kickstart your next building session with the Sprattronics LEGO Plate Builder. This free digital tool is designed specifically for educators, parents, and LEGO fans to design 16x16 LEGO Challenge Cards in seconds.

Whether you are looking for a quick STEM warmup or a way to inspire new LEGO ideas, our grid-based builder makes it easy to visualize and share "flat-build" inspirations.

Try out the Newest Version of LEGO Plate Builder!

What is the LEGO Plate Builder?

The Sprattronics LEGO Plate Builder is a user-friendly web app that allows you to design one-layer creations on a standard 16x16 baseplate. By restricting the build to a single layer, users are challenged to think about patterns, color theory, and spatial relationships—making it the perfect digital companion to physical brick building.

Key Features:

Why Use LEGO Challenge Cards?

At Sprattronics, we believe in the power of play-based learning. LEGO Challenge Cards are one of our favorite STEM warmup activities. Here’s why they are so helpful:

1. The Perfect Creative Warmup

Starting a complex build can be intimidating. A 16x16 "one-layer challenge" acts as a creative spark. It limits the scope so that kids (and adults!) can focus on a single pixel-art style idea, which lowers the "barrier to build" and gets the creative juices flowing.

2. Enhances Spatial Awareness

Translating a 2D image from a Challenge Card into a 3D physical build helps develop essential spatial reasoning skills. Users must count studs and align colors to replicate the pattern they see on the card.

3. Ideal for Classroom Settings

Teachers can use our tool to generate dozens of unique Challenge Cards. Hand them out at the start of a MakerSpace session or an engineering block. It’s a quiet, focused activity that transitions students into a "maker mindset."

How to Use the Tool

  1. Select your Baseplate: Choose the color that matches your physical LEGO plate.
  2. Pick your Brick: Choose between 1x1 tiles for detail or larger 2x4 bricks for rapid building.
  3. Design your Pattern: Click on the grid to place your bricks. Need to change something? Simply click a placed brick to remove it!
  4. Export and Print: Click "Export PNG" to save your image. Print it out, laminate it, and you have a permanent LEGO Challenge Card for your classroom or home play area.

Start Building with Sprattronics

Ready to inspire your next masterpiece? [Click here to launch the LEGO Plate Builder] and start creating your custom challenge cards today!

Build a Caesar Cipher with LEGO SPIKE Prime (Enigma Machine Challenge)

My gumball machine coins disappeared… and in their place was a secret message.

The only way to crack it? Build an Enigma-style cipher machine using LEGO SPIKE Prime.

In this challenge, we design and program a LEGO robot that can encode and decode messages using a Caesar Cipher. One motor selects the cipher key, another selects letters, and the SPIKE hub displays everything as the code comes to life.

Along the way, we:

Once the code is cracked, the mystery is solved… and the gumball machine is back in business 🍬

This project is perfect for:

Want to try this challenge yourself? Grab your SPIKE Prime kit and start decoding!

Here is my code to get you going!

Classroom Challenge: LEGO Enigma Machine

Challenge Story

The coins for the gumball machine are missing! In their place is a secret coded message. Your mission is to design and program a LEGO SPIKE Prime Enigma-style machine that can encode and decode messages using a Caesar Cipher. Crack the code, recover the coins, and save the day.

Learning Goals

Materials

Build Requirements

Your Enigma Machine must include:


💻 Programming Tasks

  1. Create a list (array) that holds the alphabet (A–Z)
  2. Program Motor 1 to select a cipher key
  3. Program Motor 2 to select a letter from the list
  4. Encode the letter by shifting forward
  5. Decode the letter by shifting backward
  6. Fix errors when shifting past A or Z

🧠 Think About It


🧪 Bonus Challenges (Optional)

⭐ Add sound or light feedback when a letter is encoded

⭐ Decode a full word instead of a single letter

⭐ Hide the message somewhere in the room for another team

⭐ Increase difficulty with a random cipher key


🏁 Success Criteria

✅ Machine encodes and decodes letters correctly

✅ Cipher key can be changed using a motor

✅ Alphabet list is used in the program

✅ Edge cases (A/Z) work correctly


🏆 Mission Complete!

You cracked the code, found the coins, and unlocked the gumball machine. Great work, codebreaker!

Mars Mission : Activate Communications

Activate Mars Communications Challenge


🧭 Mission Brief


You’re designing and programming a LEGO Spike Prime rover to navigate across a Martian landscape, activate an underground communications satellite, and send a “signal” back to Earth—just like real Mars rovers supporting human exploration.


🎯 Challenge Instructions

Phase 1: The Challenge

Phase 2: Brainstorm & Sketch

Phase 3: Complete the Challenge


Deep Space Communication

Satellite dishes are a type of antenna that uses radio waves to receive or transmit data. On a human mission to Mars, they’d be used to transmit messages between Earth and Mars. Radio waves travel at the speed of light, and because the distance between Earth and Mars is variable, there’s an approximate delay of between four and twenty-four minutes in communication between the planets.

NASA’s Deep Space Network (DSN)

NASA operates a global system of giant antennas called the Deep Space Network. These are located in:

They’re spaced around the Earth to allow constant communication with distant spacecraft. The dishes are huge—up to 70 meters wide—so they can catch the tiny signals sent from across the solar system.

Delay in Space Communication

Because radio waves travel at the speed of light, there’s a delay when sending or receiving signals from space.

This is why real-time conversations with astronauts on Mars would be impossible.

Laser Communication Is the Future

NASA is testing laser-based communication, which can send more data much faster than traditional radio waves.

This could be the key to streaming high-quality video from the Moon or Mars one day.

What the Deep Space Network Does

The DSN does more than just listen. It:

Without the DSN, we’d lose contact with most space missions!

Why Three Locations?

Each DSN station is 120 degrees apart around the Earth so that at least one of them always has a view of a spacecraft, even as the Earth rotates. This setup allows 24/7 communication with distant probes.

Satellites Closer to Earth Use a Different System

Satellites that orbit Earth don’t use the Deep Space Network. They use a different group of ground stations called the Near Earth Network. These satellites help with weather forecasting, GPS, and communications here on Earth.

The SCaN Program

NASA's Space Communications and Navigation program (SCaN) manages all the networks—both for deep space and near Earth. They’re responsible for upgrading antennas, developing new technology like lasers, and preparing for future Moon and Mars missions.


💡 Build & Code Hints

AreaHint
Drive BaseUse a sturdy wheel base that can travel straight and align easily.
Activation ArmA lightweight beam or fork that can push just enough—not too much—to trigger the activation mechanism.
SensorsUse Ultrasonic to detect when you’re close to the button; use Color Sensor or distance tracking to keep your path straight.
ProgrammingUse loops for straight motion, conditional waits to stop at precise points, and fine motor power settings for controlled pushes.

📐 Step-by-Step Measurements & Angle Calculation

Step 1: Measure distance from base to satellite button in your setup (e.g. 40 cm).

Step 2: Calculate turning angles if you need to approach the button from the side:

Step 3: Sample Code

Encourage students to fill in their exact measurements and calculated angles.


📺 Final Video Solution

Once students have built and programmed their rovers, they can watch the final completed mission. The video demonstrates a working solution—from navigation to block alignment to satellite activation and return to base.

“Mission Walkthrough” — Compare your approach with our at-home version


✅ Evaluation & Reflection

Self-Assessment:

Badge Levels:


🧰 Lesson Resources

🌻 Flower Robot Challenge: Seek the Sun!

🚀 Your Challenge:

Can you build a LEGO robot that acts like a real flower?
Your robot should spin slowly to look for light, then stop when it finds the sun (or anything yellow)!


🌱 What Do Real Flowers Do?

Have you ever noticed how sunflowers turn to face the sun? That’s not just for fun—it’s a real plant behavior called phototropism.

🌞 Phototropism means:

Plants grow or move in response to light.

💬 Fun Fact:

Some flowers stop turning once they’re grown, but younger ones still move every day!


🔧 Robot Build Instructions

You’ll build a flower that:

🛠️ Step 1: Build the Spinning Base

Build a sturdy base and mount a motor horizontally so it can spin a platform.
Make sure the whole thing doesn’t tip over when spinning!

We used the Twirling Teacups lesson as an introduction to a spinning base.


🪴 Step 2: Make the Stem

Use LEGO beams to make a vertical stem that connects your flower head to the spinning platform.


🌸 Step 3: Create the Flower

Your color sensor becomes the center of the flower.
Decorate it with bright petals—but make sure it can still “see” colors in front of it!


💻 Coding the Robot

Use this basic idea for your code:

forever:
Spin slowly
If color sensor sees yellow or a bright light:
Stop spinning

📹 Watch the example video for how this works:
Watch on YouTube

💡 Tip: You can use "wait until color sensor sees yellow" in your program, or detect brightness using the reflected light sensor mode.


🧪 Test Your Robot

Try these tests:


🎨 Bonus Challenges


📓 Record Your Learning

Use these questions in your science notebook:

QuestionYour Answer
What is phototropism?
How does your robot behave like a real flower?
What does the sensor do in your robot?
What did you change during testing?
What would you do differently next time?

🌼 Share Your Build!

Take a photo or video of your robot in action and share it with your class or post with permission!

Mars Mission : Ice Collection Challenge

Mission Brief

You're an astronaut-robotics engineer stationed on Mars Base 7. A massive dust storm has just passed, revealing delicate ice crystals on the red surface. These crystals may hold the key to:

But there's a problem: the crystals are too fragile to be picked up by normal grabbers. Your mission is to design a rover with a One‑Way Curtain to collect them safely and bring them home.


🎥 Watch the Mission Video

Check out the full mission walkthrough:
https://youtu.be/20_-gqwPFDc


Step 1: Build the One‑Way Curtain

Create a mechanism that lets ice shards pass into the collection basket—but won’t let them fall out.


Step 2: Build Your Rover

Start with a simple SPIKE Prime drive base:

Add sensors, color tiles, or bumpers if you like!


Step 3: Program the Mission

Using SPIKE Prime’s coding interface:

  1. Drive forward to sweep crystals
  2. Turn and repeat to cover the area
  3. Return to the Home Base when done

Tip: Use loop blocks, timers, or sensor-based navigation to make it reliable.


Step 4: Create Ice Shards

Make your own LEGO “ice crystals”:


Your Challenge

Build, attach, code, and collect:

MISSION GOALS

Document your mission: take photos or videos!


🗣️ Share & Compete

Once your mission is complete, do this:

  1. Comment below the video with your rover’s design and strategy
  2. Like the video if you enjoyed the challenge
  3. Subscribe for more robotics missions
  4. Tag us on social media with your rover—your build might be featured!

VENT Bot Maze Mission

A LEGO Spike Prime Challenge to Save the Mars Base


🚀 Your Mission

The Mars base has lost power. The lights are out. Systems are offline. The only way to reach the life support core is through a maze of narrow vents.
Your job is to build and program a LEGO Spike Prime robot — codenamed VENT Bot — to navigate the maze and save the crew.

Download your printable mission materials:
👉 VENT Bot Mission Tracks Printables (PDF)

💡 Pseudocode Mission Log (PDF)


🧱 What to Build

Begin by laying out a maze with items from home, class, or the printable maze tiles.

Your robot must be compact and precise. Use your LEGO Spike Prime kit to build a robot that can:

Required components:

HINT!

We used the Driving Base 1 building instructions from Competition Ready.


💻 What to Code

You’ll need to:

Example pseudocode:

Move forward 40 cm  
Turn right 90°
Move forward 20 cm
Turn left 45°

Use the printable Maze Mapping Log to record each step!

HINT!

Watch this video about using the Gyro Sensor to make precise turns.


📏 Step-by-Step Instructions

  1. Set up your maze using tape, tiles, or printed paths.
  2. Test your robot: Can it move straight and turn consistently?
  3. Use a ruler or tape measure to record distances between turns.
  4. Use the gyro sensor to test turn angles (e.g., 90°, 45°).
  5. Record your pseudocode for the entire maze path.
  6. Translate your plan into a working program in the Spike app.
  7. Test and revise — update your code until the robot can complete the maze!

🎯 Success Criteria


🎥 Watch the Full Mission Video

See how the mission begins, how the robot is built and programmed, and how VENT Bot saves the Mars base! Leave us a comment on YouTube if you completed the mission!

The Quick Guide to Building a Home Education That Rivals Government Schools

(No Cost, No Stress, Just Results!)

🚀 Why Home Education?

The U.S. education system is falling behind. Test scores are dropping, teachers are leaving, and bureaucracy is winning over students. But here’s the good news: you don’t have to wait for the system to fix itself.

With the right tools, you can build a home education that’s more effective, engaging, and personalized—without spending a dime. This guide walks you through five essential (and free!) resources used by top-performing students worldwide.

No research required – Just plug and play.
No expensive curriculum – These tools are free!
No complicated setup – Get started today.

📌 Step 1: The Five Essential Free Tools

(These resources cover core subjects and go beyond what most schools offer!)

1️⃣ NewsELA – Learn Through Real-World News

🔹 Best for: Reading comprehension, critical thinking
🔹 How it works: NewsELA adapts real-world news articles to different reading levels, making it easy for kids to learn about current events, history, and science.
🔹 Why it’s powerful: Unlike textbooks, which are outdated before they even hit the shelves, NewsELA keeps learning relevant.

👉 Get started: www.newsela.com


2️⃣ Khan Academy – The Ultimate Free Tutor

🔹 Best for: Math, science, history, test prep
🔹 How it works: Students learn through expert-taught video lessons and practice problems that adjust to their skill level.
🔹 Why it’s powerful: It’s like having a private tutor—for free!

👉 Get started: www.khanacademy.org


3️⃣ Modern States – Earn Free College Credit

🔹 Best for: High schoolers & advanced learners
🔹 How it works: Provides full, free courses to prepare students for CLEP exams, which many colleges accept for credit.
🔹 Why it’s powerful: Your child could start earning college credits today—at no cost.

👉 Get started: www.modernstates.org


4️⃣ Your Local Library – The Secret of Self-Taught Geniuses

🔹 Best for: Self-directed learning, reading, research
🔹 How it works: Libraries provide thousands of free books, audiobooks, and online courses.
🔹 Why it’s powerful: Some of history’s greatest minds—Abraham Lincoln, Benjamin Franklin, and Elon Musk—were self-taught using books.

👉 Action Step: Visit your local library or check their digital resources!


5️⃣ Prodigy – A Math Game Kids Actually Want to Play

🔹 Best for: Math fluency, problem-solving
🔹 How it works: Prodigy turns math into a fun, role-playing game, where kids solve problems to level up.
🔹 Why it’s powerful: Kids love it, and it secretly makes them better at math.

👉 Get started: www.prodigygame.com


📌 Step 2: Creating Your Home Education Plan

Now that you have the tools, here’s how to structure a powerful home education program.

📅 Daily Schedule (Flexible & Effective!)

Using these resources, you can accomplish as much as a full day's worth of government school learning in just two hours. Build the day that works for you!

Key Tip: Follow your child’s interests! The more engaged they are, the more they’ll learn.


📌 Step 3: Socialization & Enrichment

One of the biggest misconceptions about home education is that kids will be isolated. Here’s how to ensure they stay socially and academically engaged:

🔹 Join Homeschool Groups: Many local and online groups offer meetups, field trips, and co-ops.
🔹 Extracurricular Activities: Sports, music lessons, coding clubs, and art classes keep kids connected.
🔹 Community Engagement: Volunteering, internships, and apprenticeships provide real-world experience.


📌 Step 4: How to Track Progress Without the Bureaucracy

Traditional schools rely on standardized tests. But at home, you can use better methods to measure real learning.

Portfolio: Keep samples of writing, projects, and creative work.
Progress Logs: Track subjects studied, skills mastered, and milestones achieved.
Real-World Application: If your child can teach it, they truly understand it!

💡 Remember: Learning isn’t about memorizing facts for a test—it’s about mastering skills for life.


🎯 Final Thoughts: You Have Everything You Need!

By using these five free tools and structuring a flexible, engaging learning experience, you can build an education at home that rivals (or even surpasses) government schools.

📌 Which resource are you most excited to try? Let us know in the comments below!

👉 Want more step-by-step guidance? Subscribe to our YouTube channel for more homeschool strategies and free education tools!

🚀 The future of education is in your hands. Let’s make it better!